Monday, October 31, 2011

progress...at least a little

Alright nothing to exciting but its progress, this weekend i got the shock and leaf spring mounting tabs/pads cut off the 'new' 9 inch rear and then ground them down so i can have the new mounts welded on.

but before the photos of that exciting-ness...

Photobucket

proof Sarah is still in the garage helping out and not hating the car haha.

In this super secret spy photo you can see her helping out by studying cardiopulmonary physical therapy. Im not entirely sure how this relates to the car coming together, but I'm pretty sure its important. It'd be a pretty fat book for something not that important.

aaaaaanyhow, here are some pix.

now i know your thinking, why would i want to see pix of cutting off old shock mounts and leaf spring pads? well, because if you search you probably wont find any and its the little annoying things that itd be nice to google and find some help on before your hitting it with a hammer.

step one.

Photobucket

eating some BBQ and a side of stuffed squash, your mother was right. you need your veggies.

step two.

Photobucket

using a cut off wheel in a 4 inch grinder i cut the 3 sided shock mount tab along the bottom of the inner side, and then down the center. with the shock mounting bolt still stuck in there this alowed me to pivot the cut half of the bracket out of the way to cut the other half.

if you had/can get the shock bolt out it'd help even more as you'd be able to just pull the cut bit out.

Photobucket

the spring perches i cut the top out of first.

Photobucket

then with the top out i trimmed the sides down just like i did on the shock mounts by using the cut off wheel and cutting the corners off and then cutting down the center.

Photobucket

you can see it pre cut out center here. i did go ahead and cut some vertical slots into the piece that needs removed. that way your not sinking your cutting wheel very far into the metal before it removes the extra bit.

it went shockingly quick after fighting drilling all those holes for the rear suspension and to celebrate i popped the grinding wheel back on and nocked them all down.

i did leave a little of the metal on the tube as youll never see it and i just felt better about the integrity of the axle tube not knocking the weld and everything all the way down.

I'll go ahead and use the grinder to knock the rust off the sections were the new pads will be welded and then throw it in the truck and bring it to my welder to have them put on.

then its time for a new third member, axle bearings/seals, brake springs, shoes, drums, lines and then i can finally take the car off the stands and let it roll outside to see where its sitting! finally!

Priced everything for the rear at a tiny auto parts store just a block down from the shop I work at and happily found that not only can this dad and son store get me my parts for easily a third of what the chain stores want if not LESS, but they also carry a selection of new and used old ford parts all the way back to model T's. awesome :)

all goes well the dash gets painted next weekend!

Sunday, October 16, 2011

flash backs...

found some old photos of past cars snooping around my photobucket account and thought id post some up :)

Photobucket

1953 ford customline 2 door, 77,700 miles, second owner car. nosed and decked :)

Photobucket

lil dusty

Photobucket

actualy still have this old air breather on the shelf, think i might make it into a non oil bath style filter for the 46 and get it chromed :)

Photobucket

didnt have a garage so i actualy got this car back into driving condition and tweaked in the garage i found it in listening to an old johnny cash album on the radio that was already there haha. further updates were made in the dorm parking lot in lincoln.

Photobucket

Photobucket

shiney :)

Photobucket

audi flexing some serious muscle putting new spark plugs in after rebuilding the brake master cylinder for me.

Photobucket

~ totaly random, but it was in 'order' on photobucket. heres my 63 corvair monza 900. dual carbs, dual exhaust,4 speed, generator and bias plys. keeping it trad haha

Photobucket

Photobucket

made its first drive to my parents house!

Photobucket

complete with 56 olds tail light lenses, fancy right? cant stand the stock ones so it wasnt a big deal when i accedently drove over one of the stock lenses.

Photobucket

some thin whites on black steelies, swapped to 12 volt still on a generator, mexi blanket seat 'cover' and we're rolling.

Photobucket

Photobucket

some how decided that the first trip longer then a few blocks should be to drive 3 hours to lincoln, thats 3 hours driving the speed limit. lets just say it took a little longer haha.

Photobucket

an old photo shop of a 55/56 ish olds grill on the car like i had planned to do before i sold the car.

Photobucket

shots from the drive to nebraska

Photobucket

Photobucket

handsome eh'? ha

Photobucket

i remember this drive soooo well, it was a definant turning point in me falling in love with driving old cars. the world threw a 50 plus year old windshield is a totaly different place.

Photobucket

met audi south of sioux city to convoy to school together, her trust neon as support vehicle for the 'short' turned epic long trip.

Photobucket

wasnt charging super well, this would be one of the serveral stops to blow out the fuel filter and get a jump start.

Photobucket

havent lived until youve pulled a starter, re attached it, blew the fuel filter out and replaced it, and re polirized the gernrator a few times on the side of the road in an indian reservation middle of now were. ;)

Photobucket

not even to fremont i remember asking how for lincoln was and thinking 'theres no way we are still that far' haha

Photobucket

we left the car in fremont at my grandmas house and came back the next day with a different fan for the car... dont realy recall why i kept swapping the fan... but following ryans firebird back to lincoln seeing 27th st has never felt so good haha

Photobucket

parked at school, cant believe that when some one tried to break into it they busted the perfectly good drivers door window and not the already bullet riddled back window? morons

Photobucket

first cruise night!

Photobucket

was still pinstriping at that time...and waaaaaaaaay less tattooed :O

Photobucket

chilling in bob bleeds model A sedan with jonny cola, tuck and Aud the 53 didnt make it but we did :) lol worst, weekend, ever. but at least we can say we've slept in the attack of an industrail building before haha. we actualy ditched the show the second day and went to a giant gay pride parade. it was a much better time, then we went home a day early i think.

did a test run with the car to flashbacks in omaha the week before BTT50s and just wasnt feeling confident in it so we left it in lincoln.

Photobucket

did make it to livefast in omaha though, were it puked its guts out all over the parking lot. i dont know if it was actualy over heating but i do recall it still not charging and rocky making a new thermostate housing gasket out of a piece of cardboard. the car chilled at a freinds house for a couple days while we figured out a game plan to get it back to lincoln... game plan, fresh battery and drive like hell! it worked :) that was a good 6 years ago now! wow.

Photobucket

hauled around TONS of extra parts in that car, even this old aftermarket aluminum 4 barrel intake i ended up selling, haha.

Photobucket

Photobucket

ryan chilling with the car @ americruise when it came threw lincoln, im preety positive dumping the clutch on this 3 speed v8 flathead with nearly no exhaust is what hooked him on flatheads. a sweet sickness indeed ;) glad he got the one out of the 46 for his hot rod :) seeing as i feel sorta responsible for the flatheadightous

Photobucket

good times

Photobucket

even met up with BobK on his way to Bonneville for a steak!

Photobucket

Photobucket

artsy shots of just crappy shots? its a fine line...

Photobucket

saying goodby before it heads to...somewhere south... im kinda curious were it ended up these days.

anyhow theres some pix and memories :) good times, good freinds :)

just keep chugging

so got a little more work in it this afternoon and thought of you guys, i did a quick mock up to see what ride height should be after seeing some of you say that similar 'kits' have put the rear up to 4 inches ABOVE were they started out.

any how, with a 215/65/r16 which is around about 26 inches tall it looks like it should tuck at least a half inch of rubber up into the fender opening with no blocks or anything.

todays progress was limited more or less to getting the drivers side rear spring mount installed. its been a massive pain trying to get those holes just ride with out the bit walking a little or anything else. its always just a tad off resulting in a lot of little filling and messing to get the bolt in. but oh well its better then owning a donk

any how, the drivers side came with some delimas that the passenger side did not. mainly there is a panel deviding the inside of the fender. the fron thalf is were the tire is and the back the fuel filler neck. its got a few bolts that hold it in and it falls pretty much exactly were the rear most bolt needs to go. mine were preety rusted and im not to concerend about the filler neck getting dirty so i just bent it up out of the way the best i could and went to work. in the coming week i think that ill take a cut off wheel and clearance the panel so it can sorta remain intact but not be in the way of the rear spring mount.

unless were i bent it causes it to need to be totaly cut out, in which case ill just do that.

something i also noticed after checking the squarness of my brackets and frame rail that the bottom of the rail needs to be about 1/16 to an 1/8 inch narrower to allow the bracket to seat flatter against the rail. i just used a grinder and made it happen. ill probably end up going back to the other side and doing the same. i noticed that with out the frame clearanced the bracket sits just tilted enough that it makes connecting the rear shackel from spring to mount. you could probably muscle it in but im kinda leary of that causing some bind?

anyhow, tomorrow i should get the front mount knocked out and the spring hung, and hopefully ill also get the holes drilled for the shock mounts as well as cut out the old U bolts as there is not enough room to just pull them out with the body still attached.

im thinking if i cut roughly at the 90 at the top of the U bolt i can get the out with one cut per bolt. just pulling the straight side out and swiveling the 7 shaped one around and out.

hopefully with this done i can move forward with cutting a hole to get to the back of the shock mount bolts to lock those in place and then get the tank cleaner started so it can sit for a couple days while i clean and coat the rear rails and floor above the gas tank.

then being optimistic i can start in on my 9 inch. it looks to be about 3 inches narrower then the stock rear which puts the tires roughly 1.5 inches tighter then stock, but i dont see any clearance issues, if anything it will help the tires tuck up into the fender a little better.

thats it for tonight if you want pix just scroll down to last week and pretend theyre flipped
__________________

Monday, October 10, 2011

part 2ish

alright, day two.

Photobucket

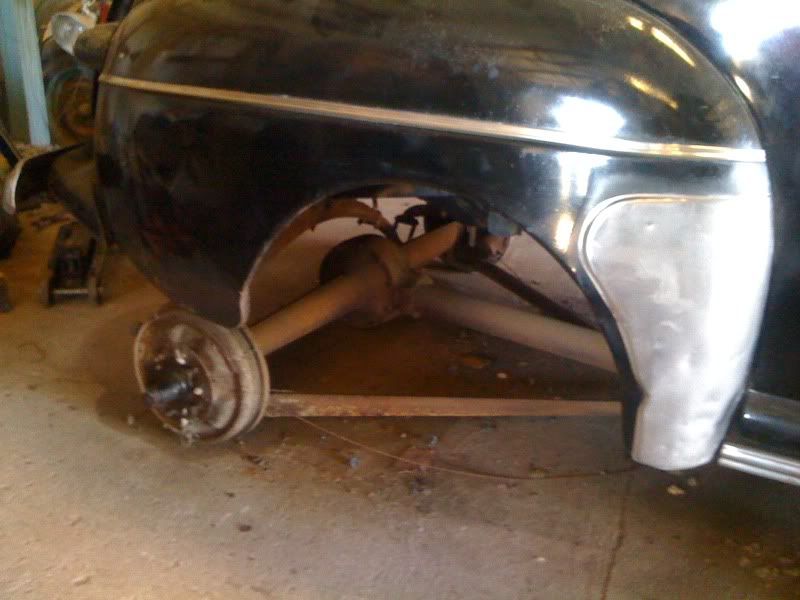
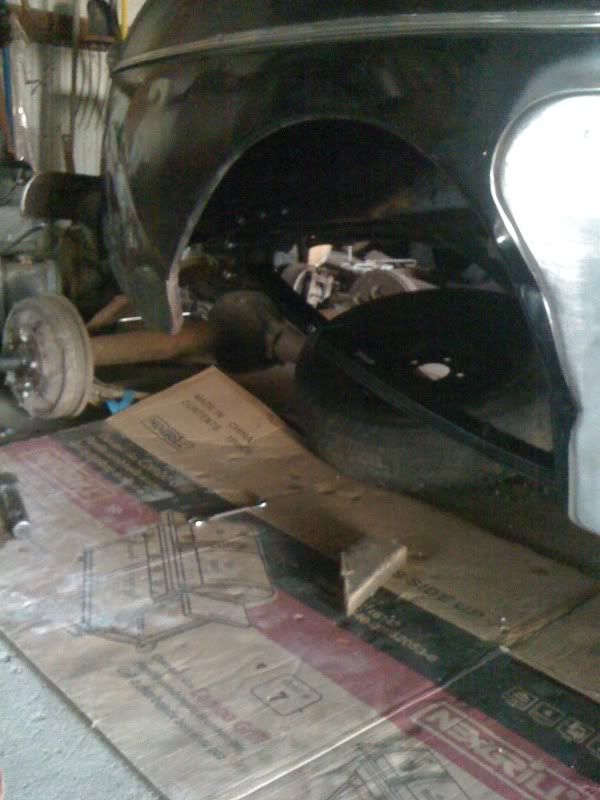
i had just left the rear assembly under the car last night so today that was first on the to do list. it was a bit of a struggle but i got it pulled back far enough for me to work under the car.

the assembly all together on wheels moves around kinda like a hand cart but with no wheels and tires on the car its a bit stuborn, you can have the rubber on with out having hte car jacked sky high if you want to roll it out.

the main thing that i ran into that if i could, would do different next time is to either remove the torque tube from the rear completely or to at least take off the bit were the speedometer cable screws into the TT.

the rear was covered in dirt and im hopefully going to sell it all together so it just seemed easier to leave it bolted together. and my speedometer sending unit was fairly seized up so it stayed and the line got cut.

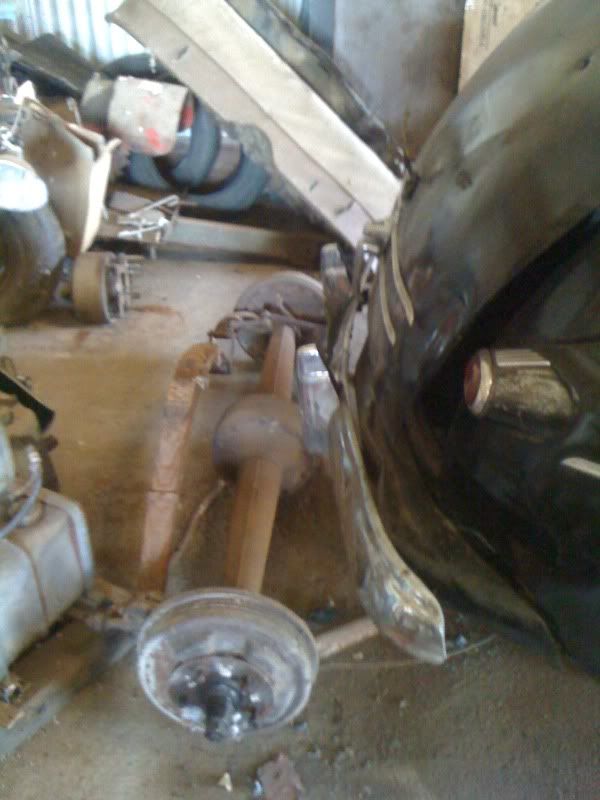
the reason i note these two things is when you go to roll or push the axel back the bell of the tt and the speedo bit get caught on just about everything when you try to pull it threw the X member. i ended up crawling under the car and holding it up with my hand and sticking a scrap of lumber under it to keep it at the correct height then went back to pushing the axle back. it took a couple of times back and forth but it worked. it sounds easy, but it was a little frustrating.

aaaaaanyhow...

Photobucket

with it out of the way behind the car i gathered up my tools for the day.

Photobucket

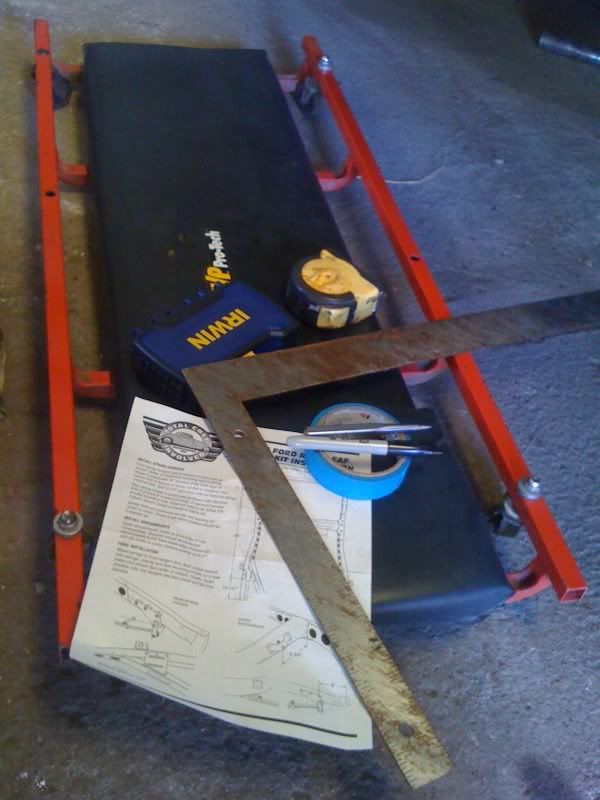
i think thats most of it, along with some ear protection and a broom. id recommend some safety glasses or the like also.

Photobucket

the instructions are pretty sparse so i didnt want them floating away, i held them down with my second favorite tool.

Photobucket

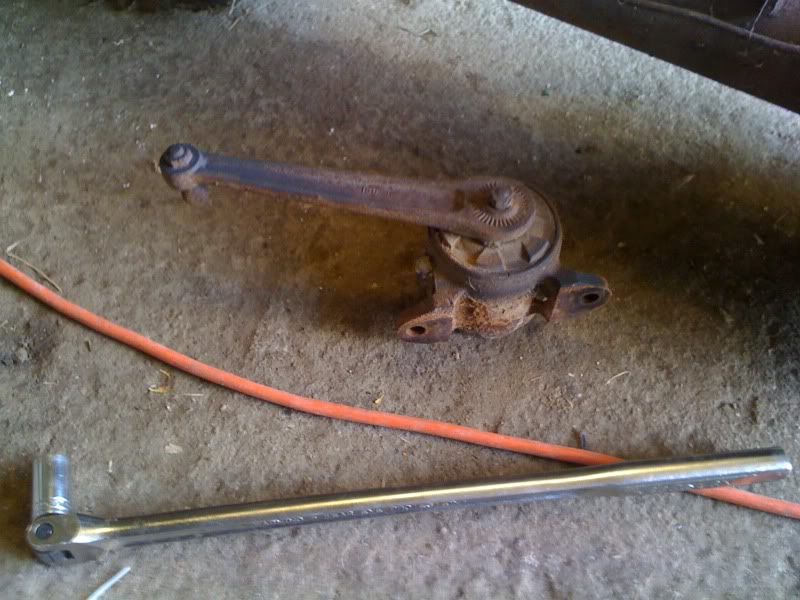
this would be my first :)

any how i set to measuring up were i need to make my holes. there seem to be 28 that need drilled but the directions tell you were to put about 2 per side of them. cute right?

Photobucket

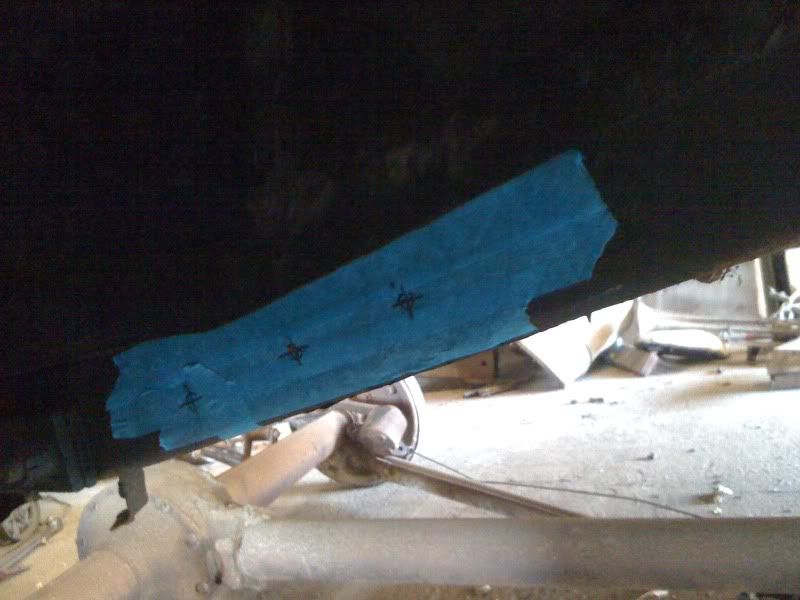
i measured roughly were the rear mount would land and tapped it up. i figured that sharpie on blue tape would be a whole heck of a lot easier to see then any sort of markings i could think of to show were i need to drill.

Photobucket

the 'instructions' give you measurements on were to place a hole on one hole of each mount. i held them up where i figured they needed to go and marked the centers of the holes the best i could. i could have done a better job looking back but im not realy sure how.... anyways...

i took favorite tool #2 and center punched were i would need to drill my holes. i made the X's on the tape fairly large so id be able to see were center was located if the tape ripped a bit. after that i went threw and drilled pilot holes for all 9 holes for the side.

spending the extra money on good bits was worth it but i still snapped two just from being at such a funny angle drilling the holes :S

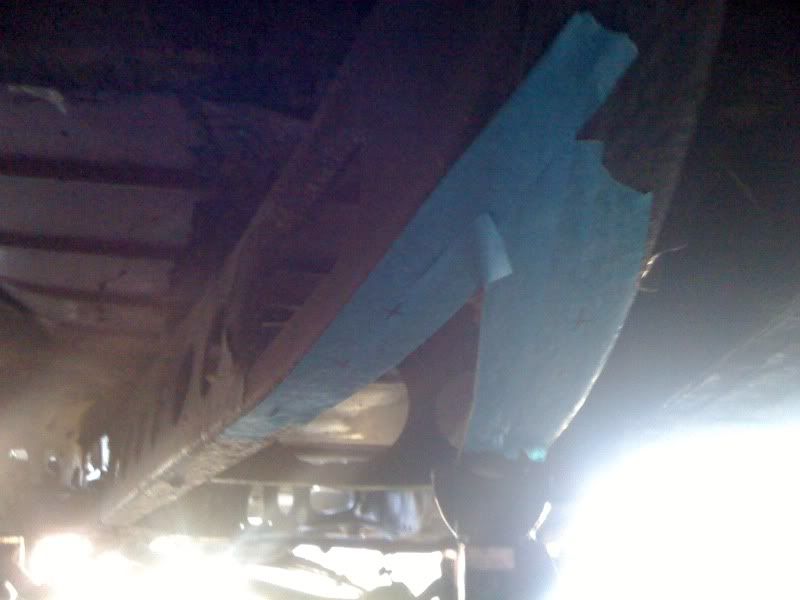
i will make note that on the rear hangers i did the measuring on the outside of the rail because the channel of the rail has the open side facing the inside and the bracket uses spacers to make it work. so it was the only way i could mark directly threw the bracket.

i also pilot drilled from the outside, with the smaller bit i had room for my fat hands and even fatter drill between the fender and body/rail to get it done. however, i did drill the full size holes from the inside out as there is waaaay more room and the drill bit was to big to fit.

Photobucket

its a funny spot so i had to pull a 'pillow' over for me to rest my shoulders/head on so i could see what the heck i was doing.

the holes over all werent to big of a pain, i attempted taking my time and sprayed it with wd40 a few times to help the chips move out of the way. this is were i will say some saftey glasses/goggles would be a good idea. your in all sorts of funny positions with chips flying in your face doing this. i only finished the passenger side today so when i get on the other side i will most def have something more then my glasses protecting me.

Photobucket

so with holes drilled i bolted the brackets on. this is the front spring mount. i think 3 out of the 6 holes lined right up and the other 3 i needed to run the drill back threw the hole threw the bracket to get it all just right. i was off a teeny bit sometimes and other times about a 1/4 of the width of the bolt. again not sure how i could have gotten things lined up better when marking other then doing two holes and drilling the rest of them with the bracket on but that seems like a good way to gnar up your bracket.

and yes, i did measure, and re measure about a dozen times before drilling anything so im thining the bits just walked a bit when i was putting holes in, paired with being a titch off i was definantly off a bit.

Photobucket

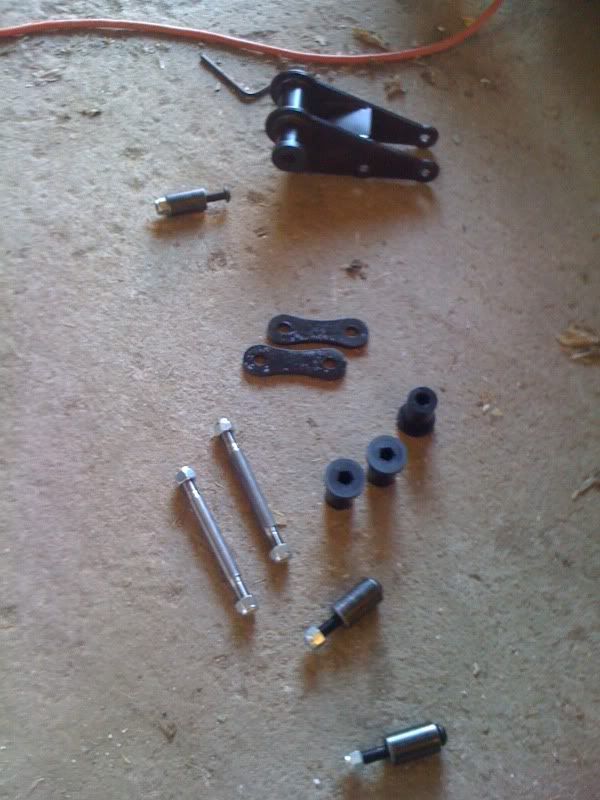
i had previously un packed everything and figured out what bags of bolts go with what so when i got to it today i was able to sort everything out per piece pretty easy.

Photobucket

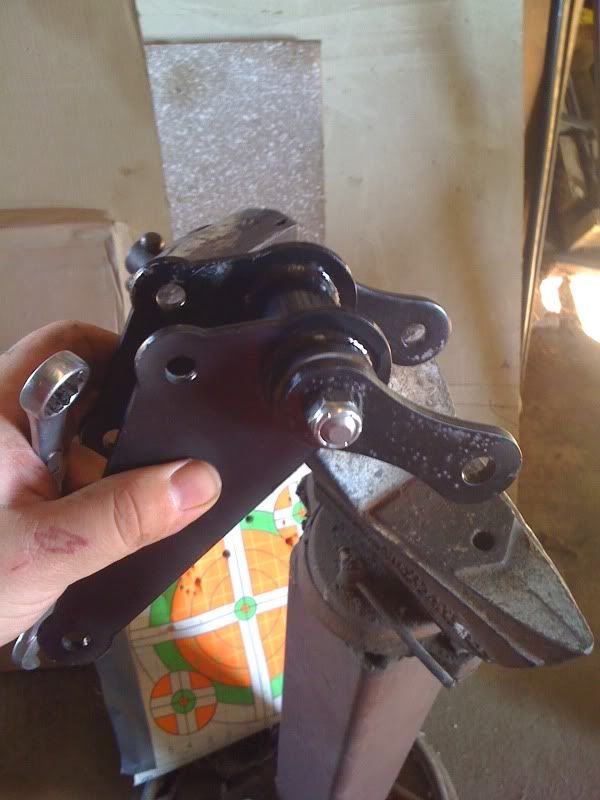
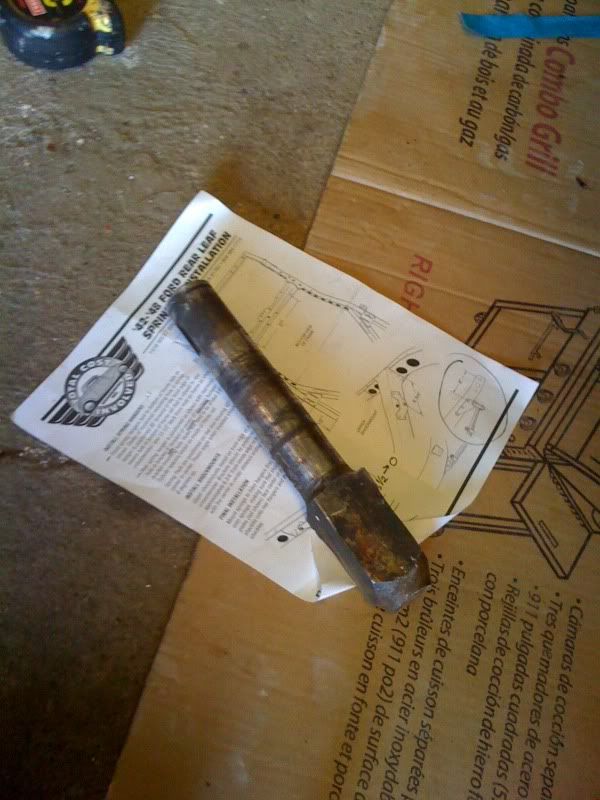
here is the rear spring hanger with the shackle bolted to it. i pressed the bushing in by hand and then used a 6 pound hammer and a vice to get the bolt threw it. in retrospect i should have left one side of the shackle un bolted as i ended up having to take it off to hang the spring and i dont want to take those nylon lock nuts off and back on more then once.

any how i got the rear hanger in place, put the spacers in and bolted it all up, had the middle hole not want to line up but it mostly ended up being a sequencing thing. id put the front and back bolts in and tightend them down before putting the spacer and bolt in the center hole and it misaligned it a bit.

Photobucket

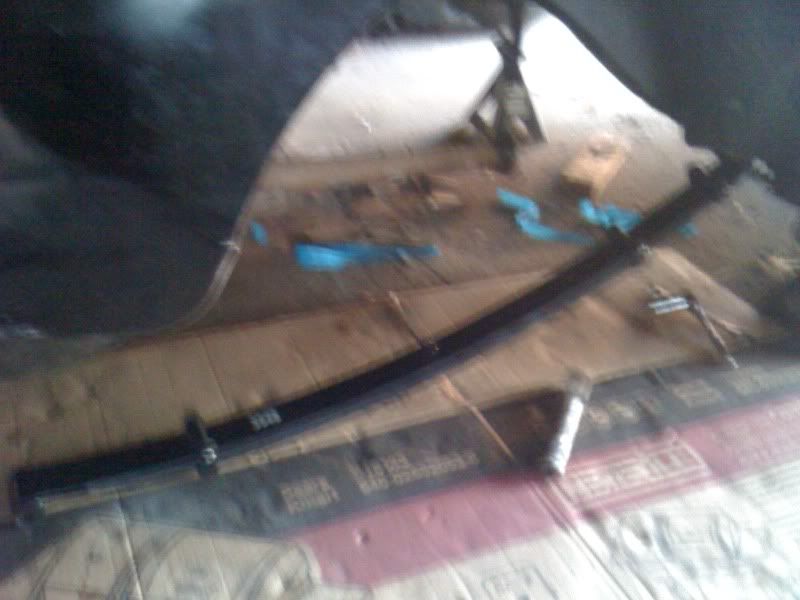
put the front spring eye into the hanger no big deal.

they want you to bolt up your rear end next but seeing as i still need to rebuild it all it made more since to leave it out and wait till its ready to go, less moving that heavy sob for me always sounds like a good idea. ill lift it up onto a big steal welding table and start tearing into that in the next week or two.

Photobucket

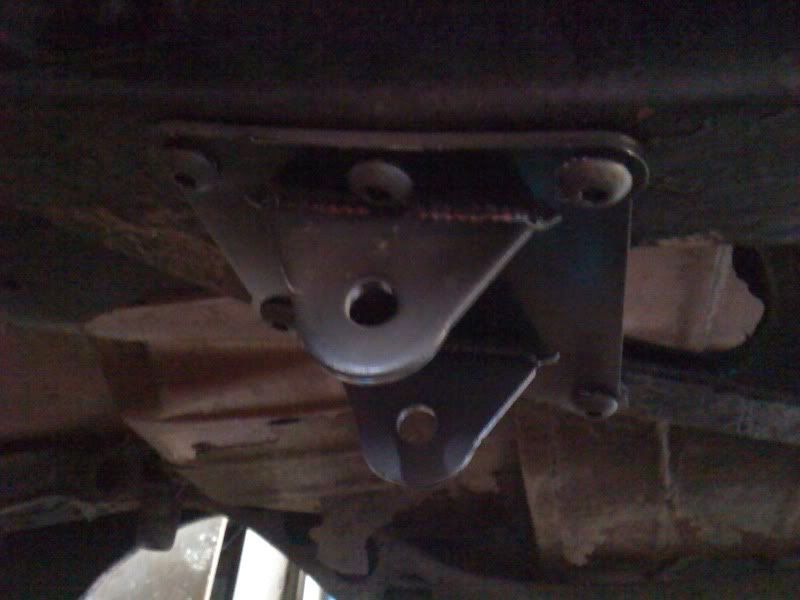
rear hanger connected.

Photobucket

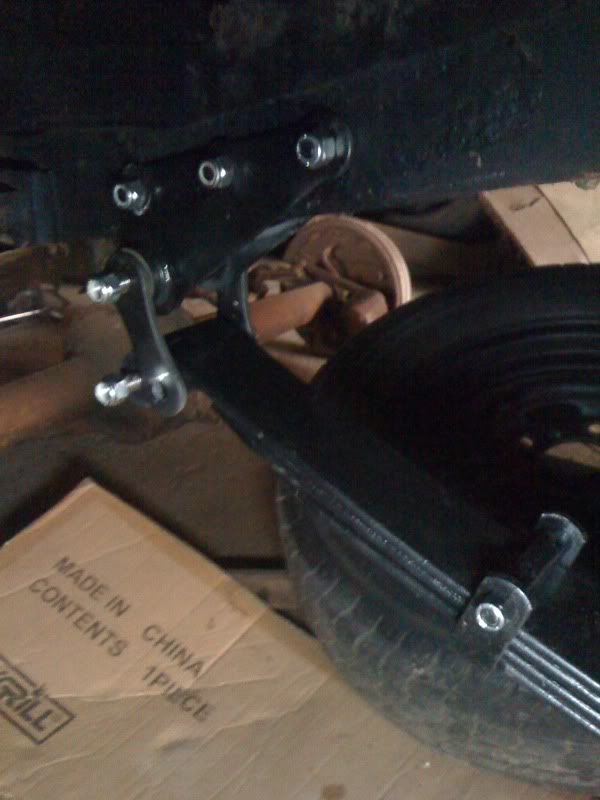
you can kinda see how the bracket tucks up into the frame here, you can also see that the bottom of the shackle isnt totaly bolted together. the nuts are just barely sitting on the bolts so they are not touching the nylon so when i go to put the new 9 inch in ill have brand new nuts.

Photobucket

i try to mix up big dollar stuff with 'free' stuff, big and little stuff, and important but cant see it and non important but is way visable when i build. i feel like it keeps some fun in the build, you dont get hit with all this $$$$ stuff back to back, you get a breather from the hard stuff while messing with easy stuff but still make progress, and when you do something little that shows it keeps the flame alive for the project.

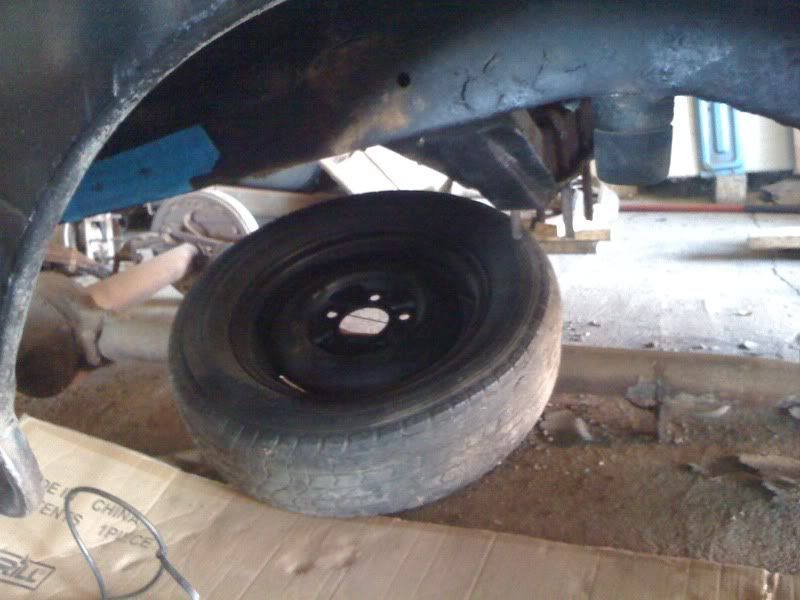
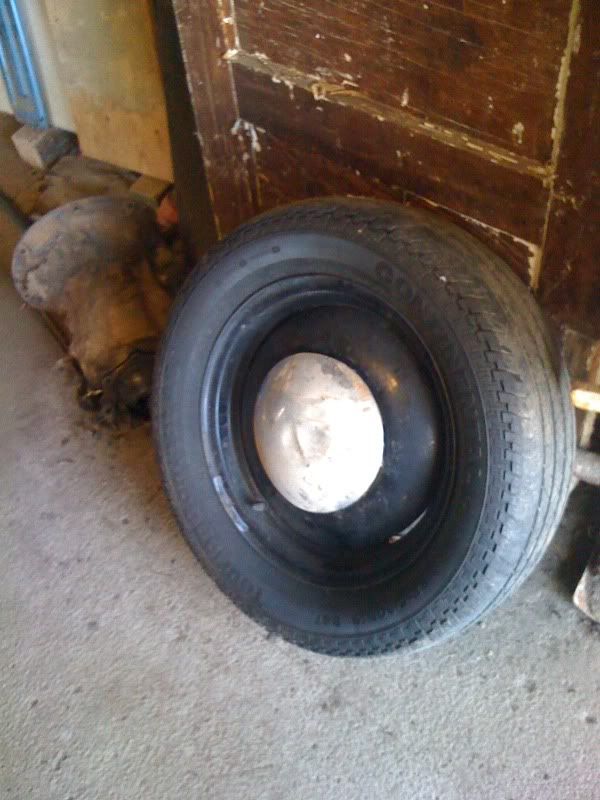
i was walking back from watering a tree, haha, and found this old moon cap so i thought id see if it was the right size/shape that i thought it was. it fits!

Photobucket

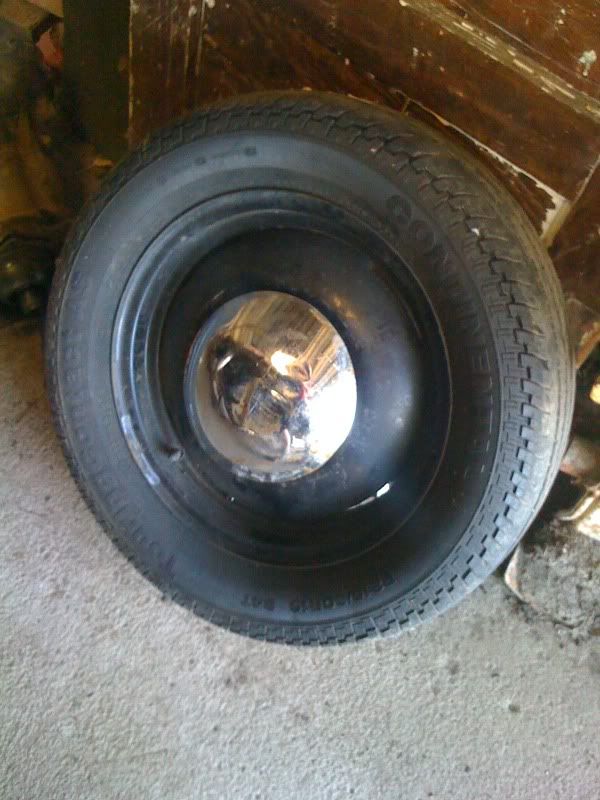
washed it up a bit and im super stoked! im going to run 40 ford caps but hadnt fully pictured it in my mind yet. i looked over at that wheel/cap probably 30 times and smiled while working today haha.

over all this side took me roughly 4 hours from the time i started measuring to when i bolted up the last bit. a plus side of working out of a farm shed is few outlets, hardly even a cell connection let along a land line, no tv, no ac, no couch, no distractions. just work on the car and listen to the radio.

my back is all sorts of tight and kinked up and ive got a very busy week at work ahead of me so ill let myself recover and hit it again maybe wednesday or thursday night. then with that all done ill get the gas tank flushed, cleaned and all that things going to need. under coat the floor above the gas tank, start into rebuilding and re gearing the 9 inch that aught to take up the next week or two and then itll be time to run my dash to nebraska to get my dash painted up all shiney like :)